I have been asked, “Why are you reinventing the wheel?”, referring to my making traditional steel double pointed needles (DPN) when they are available at (http://www.manorhouse.clara.net/knitwear/woolkits.htm), (http://www.lacis.com/id.php?c=RP20), & (http://www.iriss.co.uk/iriss.html) and other places?
I am not "reinventing the wheel"; I am restoring an old wheel.
Sure, each of these vendors offers 16" steel DPN. However, for my current project, 12" needles are long enough, and ever so much easier to work with. It took me an hour to make the shorter needles (and $2 in materials). In the course of this one project, the shorter needles will save me hours and hours of work and frustration. Then, I am going to knit a similar gansey for my wife. I only learned the advantages of the shorter needles by trying longer needles and then trying shorter needles. If I had just bought the long commercial needles, then in the course of these two projects, I would waste days! (Compared to doing the project on my homemade shorter needles.) And, days wasted are the difference between finished objects and unfinished objects! If a really fat person wants a gansey, I still have that set 18" needles that will hold a round of 500 stitches. Talk about a waste of time! I think I would tell the fat one, that I will knit them a gansey when they have dropped a couple of hundred pounds!
I tried different shaped tips on my knitting needles. And, it turns out that different shaped tips have advantages for different yarns. It was very traditional, for knitters to regrind the tips of their knitting needles on a regular basis. Now, I have more understanding of the how and WHY. I have a drawer full of modern, commercial 7.5” aluminum DPN. And yet, I am currently making myself a set of 7.5” steel DPN. Why? Because for the tighter gauge that I am now knitting, I want a long, gradual taper to a finer point than I find on the commercial DPN, and the tips on aluminum DPN can not be reshaped. That long gradual taper helps avoid dropped stitches when knitting at high tension. And, the long taper helps produce a very tight fabric. I am not reinventing, I am trying to understand a tradition, and write the details down. Since much of this is experimental, I am putting some of my work up for peer review.
The colors of the modern, commercial, “5-ply British Gansey yarns" are close to boring. The traditional gansey yarns were handspun and hand dyed, even as late as 1900. Those yarns had more textural and color interest. This is one reason that I like the Cottage Craft yarns. The Cottage Craft yarns have great color interest, and they produce a fabric of the right texture on US # 1 needles. In addition, the Cottage Craft yarns have some oil in them like a real fisherman’s yarn. (As I have said before, I have no connection to Cottage Craft except that I like their yarns and their prices.) Yarns by other suppliers are wonderful, but may be a slightly different weight that will require a different needle sizes to produce a traditional gansey fabric. If you use different yarns, you will want needles that are not commercially available. I merely remind friends that is possible to inexpensively make knitters tools, and that for some projects, those inexpensive homemade tools will be better than expensive commercial products.
I also try to remember the advantages of modern commercial products. For example, circular needles are much safer. I am not sure that I would dare to use long sharp DPN in any area where there are small kids. And, in a damp fisherman's cottage, the rust problem with steel needles would be huge. I really admire those mothers of generations past, knitting for their fishermen. In those days, a warm gansey was the difference between fishing and dying of cold.
Friday, January 27, 2006
Thursday, January 26, 2006
Short and Sweet Works
My main knitting project now is either fisherman's gansey or figuring out how fisherman's ganseys were traditionally knit. In the last 24 hours, I have made significant advances in the "HOW" part of the project resulting in dramatic increases in knitting speed.
The gansey is based on a Gladys Thompson pattern (Filey Pattern V) that I have adjusted to a 42 inch chest and a 7 s/i gauge using a worsted weight yarn on US size 1 needles. This give a tight fabric with excellent stitch definition
I started the project on 18" DPN because that is what the preface to GT's book by Elizabeth Zimmerman and the introductory material by Thompson said were traditionally used for knitting these garments. However, I had a terrible time just joining the first round without a twist. After much fustration, I actually ended up knitting the first couple of inches of ribbing on my trusty circular needles. The stress on my hands was substantial.
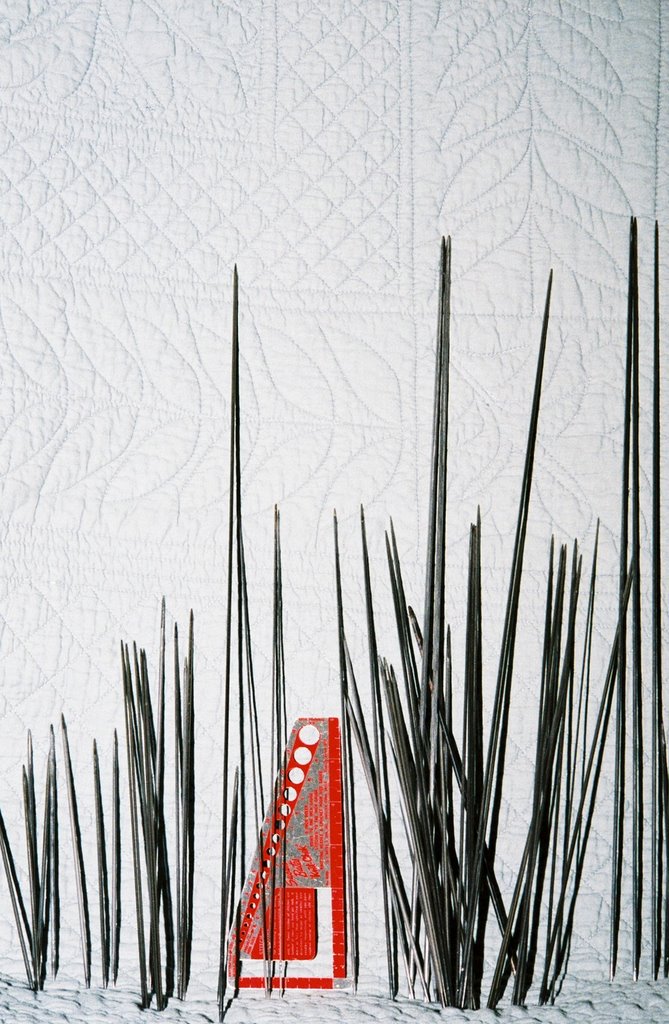
When the cable on the circular needles broke, I knew it was tme to move foreward with research on the DPN/knittng stick technology. I made a set of 12 " steel DPN that had much longer taper from the diameter of the shaft to the tip. My original set of DPN had been made using the angle of taper from the (Boye) aluminium DPN. The new set of shorter DPN used approximatly the angle of taper from the (broken) AddiTurbos. This made a tremendous improvement-- many fewer dropped stitches. The point of the new needles is quit fine. The points are carefully rounded and polished, but quite fine.
The 12" needles are much easier to work with then the 18" needles. Twelve inch needles are suffienctly long that each needle can carry the 80 stitches assigned to it with more than an inch of bare needle at each end. There does not seem to be much tendency for the needles to slip out of the knitting.
The lower end of the right needle in inserted into a knitting stick that is tucked under a heavy leather belt. The heavy leather belt provides additional stability and support to the knitting stick holding the right needle.
The yarn is carried and controlled with the right hand, which also moves stitches down the right needle.
I learned to knit English method (yarn in right hand) in colledge, but never knitted much because I was just such a slow knitter. Three years ago, when I resumed knitting, I switched to contental method (yarn in left hand) to speed my knitting and actually get something knit. My knitting speed did increase significantly using the contental method. The knitting motion using a knitting stick is different from the English method that I learned, but after only couple of hours of experimentation, I am already knitting faster than I could ever knit using the contental method. Now that I know how knitting with a knitting stick is done, I expect that with practice, I will get much faster.
I notice that knitters in the old photographs are always shown wearing aprons. I never thought about that much untill last nignt. My new DPN with there fine points are just the right length to dig into the your lap. With in a few minutes of starting knitting with the new needles, I got up and put on a heavy duck apron, and I was already wearing a stout pair of denium jeans.
In short, there are some real downsides to the technology that I am moving toward. I have a bunch of new AddiTurbos on order, so I am not abandoning modern knitting technology. Long, sharp, steel DPN are dangerous. (And, they rust in an flash!) They are the knd of danger that your mother warned you about. I would not evern think about taking my new sharp DPNs onboard an airplane! On the other hand, sometime dangerous is fun!
The gansey is based on a Gladys Thompson pattern (Filey Pattern V) that I have adjusted to a 42 inch chest and a 7 s/i gauge using a worsted weight yarn on US size 1 needles. This give a tight fabric with excellent stitch definition
I started the project on 18" DPN because that is what the preface to GT's book by Elizabeth Zimmerman and the introductory material by Thompson said were traditionally used for knitting these garments. However, I had a terrible time just joining the first round without a twist. After much fustration, I actually ended up knitting the first couple of inches of ribbing on my trusty circular needles. The stress on my hands was substantial.
When the cable on the circular needles broke, I knew it was tme to move foreward with research on the DPN/knittng stick technology. I made a set of 12 " steel DPN that had much longer taper from the diameter of the shaft to the tip. My original set of DPN had been made using the angle of taper from the (Boye) aluminium DPN. The new set of shorter DPN used approximatly the angle of taper from the (broken) AddiTurbos. This made a tremendous improvement-- many fewer dropped stitches. The point of the new needles is quit fine. The points are carefully rounded and polished, but quite fine.
The 12" needles are much easier to work with then the 18" needles. Twelve inch needles are suffienctly long that each needle can carry the 80 stitches assigned to it with more than an inch of bare needle at each end. There does not seem to be much tendency for the needles to slip out of the knitting.
The lower end of the right needle in inserted into a knitting stick that is tucked under a heavy leather belt. The heavy leather belt provides additional stability and support to the knitting stick holding the right needle.
The yarn is carried and controlled with the right hand, which also moves stitches down the right needle.
I learned to knit English method (yarn in right hand) in colledge, but never knitted much because I was just such a slow knitter. Three years ago, when I resumed knitting, I switched to contental method (yarn in left hand) to speed my knitting and actually get something knit. My knitting speed did increase significantly using the contental method. The knitting motion using a knitting stick is different from the English method that I learned, but after only couple of hours of experimentation, I am already knitting faster than I could ever knit using the contental method. Now that I know how knitting with a knitting stick is done, I expect that with practice, I will get much faster.
I notice that knitters in the old photographs are always shown wearing aprons. I never thought about that much untill last nignt. My new DPN with there fine points are just the right length to dig into the your lap. With in a few minutes of starting knitting with the new needles, I got up and put on a heavy duck apron, and I was already wearing a stout pair of denium jeans.
In short, there are some real downsides to the technology that I am moving toward. I have a bunch of new AddiTurbos on order, so I am not abandoning modern knitting technology. Long, sharp, steel DPN are dangerous. (And, they rust in an flash!) They are the knd of danger that your mother warned you about. I would not evern think about taking my new sharp DPNs onboard an airplane! On the other hand, sometime dangerous is fun!
Friday, January 20, 2006
The gansey is under way - sort of. The pattern will be “Steps and Cables,” similar to the Filey Pattern V in Gladys Thompson’s book. I wimped out somewhat on the gauge – only 7 stitches per inch – I can do that on circular needles if the long needles get to be too much of a bother. Still 300 stitches is a long round by modern standards, and with 12 cables and other stitch work in every round, it will take me a while. I am a slow knitter.
When I started knitting socks on DPN, I thought it was like fighting spiders with my bare hands. With experience and better tools, knitting socks became like playing with a very tame pet spider. It was easy. Eighteen inch long needles have leverage that make it more difficult. Knitting on 5 long steel needles was like fighting wicked spiders on steroids. It took a couple of tries to get to get the round joined without a twist. The first couple of rounds were very slow and awkward. If I got interrupted, and set my knitting down, when I came back, there would be a twist in it. I got mad, got out my well-worn Addi-Turbos and did a round on circulars. I looked at it – and frogged it.
However, knitting that yarn at 7 s/i on the circular needles did put noticeably more stress on my wrists. I am going to try getting the ribbing started on circulars and then switch to long DPN and a knitting stick to save my wrists.
Thursday, January 19, 2006
Cabling On
Back when I was chemistry major, all the “pre-med” students wanted “chemistry for majors” on their applications to medical school. There were hundreds of the freshmen pre-med students and only 30 places in the chemistry for majors laboratory, so the pre-meds had to all be weeded out within the first week of the fall semester. The year I was there, this was done by giving a very long reading assignment on the fist day of class with the instruction to read very carefully as there would be an exam on the material at the next class.
The correct answer for that exam was to say that the chemistry text contained a serious error in its math; and was therefore wrong. “The book may be wrong" was the best lesson that I learned at the university. I remember this lesson when I look at books on knitting.
Cabled cast on is the standard way of starting a gansey. Every knitting book illustrates it showing it being done with two knitting needles. I looked at the pictures and I learned to do it. It is not hard. I used it for socks and hats and pattern swatches, but this is my first really tight gansey that I have done. Anyway, for some reason, I was having trouble getting a nice consistent, cast on. Part of it is that I hold these long needles at a different angle than I hold the shorter needles that I had used for the pattern swatches. I cast on and I ripped off.
The solution is to use a crochet hook. A correctly sized crochet hook is a faster, easier way to do a NICE cabled cast on to a long needle.
Wednesday, January 18, 2006
Knitting Sticks or Sheaths
The title refers to an old knitting implement used to anchor one end of the right knitting needle in the traditional method of knitting in Europe and Great Briton. In this method the stitches were formed using the left needle, and the yarn was controlled with the right hand. The right hand also pushed stitches down the right needle. The power of this method is it allows the stress of knitting to be transferred to the large muscles of the upper arm and shoulders. This method allowed the hand knitting very tight fabrics rather rapidly for extended periods of time without stressing and damaging the wrists.
While many of our older knitters were trained to tuck the end of their right needle under their right arm, this tends to inhibit upper arm and shoulder movement thereby defeating the most valuable aspect of the traditional knitting method.
Both English knitting and Continental knitting can be performed so that most of the stress is transferred to the large muscles of the upper arms and shoulders. However, with circular needles the tendency is to use smaller movements generated in the hands and forearms. When people knit tightly on circular needles, they are frequently placing unsustainable stresses on their wrists. And, when knitting fine stitches, the use of hand and forearm muscles instead of the larger and more powerful muscles is even more pronounced. Unless you are really watching your knitting form, knitting a fine gansey on circular needles is an invitation to wrist surgery. Compare that to the knitters using the traditional knitting method that knit 6 or 8 ganseys a year, for year after year.
While I fully understand the problem, I have not gotten very far up the knitting stick learning curve. I made a couple of knitting sticks (and of course all the required DPN), and I am learning to use them. It is hard.
One knitting stick is made from olive wood. It was cut green, whittled into an elongated “S” that could be tucked under apron strings (authentic), allowed to dry, sanded smooth, and holes to fit # 1 needles bored into each end of the “S”. With 7 ½ inch needles it should be good for socks, but so far it has only been used for pattern swatches.
The other knitting stick is patterned after an old Peruvian design, sort of like an antelope jumping with the hole for the knitting needle where the head would be. It fits in the bottom of my knitting chair and is for the 18” gansey needles. Again, so far it has only been used for needle testing and gauge/pattern swatches.
This finishes an overview of what I had to learn that was not in the books about Ganseys. Soon, I will cast on to knit a traditional gansey on 5 long needles.
Golden Needles
I resumed knitting in September of 2003. And from then until January 6, 2006, I was frustrated. I could not reproduce the fine stitch patterns of the traditional fisherman’s gansey. Then, I had my epiphany.
The modern books on knitting all said that for “worsted weight” yarn, one should use US size 7 or 8 or 9 needles. That did not giving me the 8 stitches per inch called for in traditional gansey patterns. Of course, the gansey patters asked for US size 1 needles, but the modern knitting books suggested using lace weight yarn with such small needles. With lace weight yarn, the stitch patterns of the gansey disappeared. I could not reproduce the texture and appearance of the old ganseys.
Over the holidays, I was knitting swatches of different yarns on some # 1 needles, and I realized a couple of things. First, that a “just under worsted weight”, was just the right weight yarn to give the 8 stitch per inch gauge that I wanted, and that the # 1 needles that I was using were wrong for that yarn, and wrong for a gansey project. Fine needles mind you! Just the wrong needles for the job. What is on the Internet?? Nothing that looked real promising.
The rest of this post is about making the right needles.
Now, I knew that the old time gansey knitters used steel needles. So, I went to the hardware store and I bought some carbon steel rod (they call it “music wire”) in 3/32-inch diameter. It is pretty inexpensive stuff, it only costs about $0.25 per foot. I also bought some similar sized brass rod, which is also not real expensive.
I used my little bench grinder to cut the rod to length, by rotating the rod against the wheel. This approach to cutting the needle blanks also started grinding the taper at the tip. Then, I chucked the needle blanks into my trusty; battery operated electric drill and use the drill to uniformly rotate the needle against the grinding wheel. (Wear gloves and eye protection when using the grinder.)
The rough ground tips where polished by hand with various grades of emery paper and then polished with crocus cloth. My wife was very suspicious of the ugly steel rods that came into the house, but she admits that the finished needles are beautiful, and she calls them my “silver bullets.” A similar process was used to make brass needles, which polish up even nicer, and are my “Golden Needles.” Golden needles are worth making just to keep on display, stuck in a ball of navy colored yarn. In the image of the brass needles in a ball of navy yarn, you can see that the needles are not buffed to high polish like jewelry.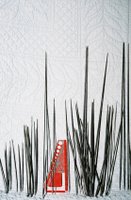
I probably have 5 or 6 iterations of knitting swatches and regrinding points, and it has taken may be 15 hours of actual metal work to produce 40 finished needles. That is really nothing compared to the weeks of work in a single gansey, and these needles should last me through the knitting of many ganseys.
After a while, I found that I could regrind and polish a set of 4 points in a total time of 10 minutes. For the Cottage craft 2-ply yarn, I like the point taper to be 3/8” long and slightly concave just behind the point. The grinding process leaves grooves in the steel, and in the concave area, these are not completely polished out. Thus, there is an area of texturing just behind the tip, which helps to move the yarn into the stitch.
The required tools are really minimal. I think most home owners will already have all the require tools. The bench grinder is a cast off of my neighbor. If I had needed a really good grinder, I could have gone over and used one of his. The electric drill is just a cheap one that we bought for chores around the house. If I lived in an apartment and did not have the tools, I could make a decent set of steel DPN in a single evening with nothing more than a whet stone that measures ½” x ½” x 4” and cost only $15.00. It would take some patience, but anyone contemplating knitting a gansey better have plenty of patience. The other required materials are emery paper and crocus cloth, which are available at any good hardware store and quite inexpensive.
The brass needles have a wonderfully smooth knitting action, which is very pleasant indeed. Brass is heavy, you will not like #6 brass needles – they are just too heavy. But at size 1, the weight is pleasant. In cold weather, brass can be cold, so these are your summer needles. Brass does tarnish, and the tarnish products are toxic, so wash your hands after use and do not let the kids put them in their mouth. And, don’t you put them in your mouth either!
The steel needles will also tarnish. That is why the commercial steel needles are nickel-plated. For various reasons, the commercial steel needles are cast. That makes them harder and more brittle – more likely to just break when you drop them on a tile floor. And then, cast and plated steel is not as easy to regrind as music wire. And, if the point that the factory put on your cast steel needle does not fit your needs, again cast & plated needles are harder to regrind. And, these days you cannot get all the multitude of sizes and lengths that a real knitter may need. Those odd sizes and lengths you will just have to make yourself.
If I have been grinding and polishing my metal needles, then to store, I wipe them with WD-40, and wrap them in a cloth and place in a drawer. If I have been knitting with oiled wool, I simply wrap them in a cloth and place in a drawer. If there is the slightest hint of rust, it should be polished off with crocus cloth, or it will get worse.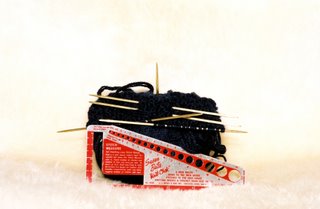

My Best Wooden Knitting Needles
When I was in school, I had a chance to touch and feel a set of knitting needles made by Faberge. With their rubies and emeralds set in gold, they were more fashion accessories for a noble woman, than practical knitting tools.
Rosewood, ebony, and black walnut have, more recently, been popular woods for knitting needles. I have used knitting needles made of these woods, and they are nice. But, when I want to invest in a really fine set of wooden knitting needles, I make myself a set of needles from flowering dogwood.
Dogwood was considered by most Native American tribes to be the wood of choice for arrows. It will take substantial flexing without damage, and is easily steamed straight. You can step on them or sit on them, without a problem – for the needles. Settlers preferred dogwood for yarn/wool contact parts for spinning wheels, looms, and of course, knitting needles. Dogwood is easily worked either with or against the grain without forming snags that will catch yarn fibers. The real disadvantage of dogwood is that its small size does not lend itself to commercial lumbering and milling activities.
I cut dogwood branches between ½ and 1 inch in diameter in the winter, selecting straight sections. Note that I just use clippings; I’m not cutting the whole tree or bush down. I cut the branches into lengths slightly longer than the needles I am intending to make. Then I peel the bark and split the wood in quarters or eighths depending on the diameter of the branch and the size of the needles that I intend to make. The needles that I make from dogwood are US size 4 to 8, because those are the sizes of wooden DPN that I like for making boot socks.
Now, I have needle blanks with a triangular cross section. With a needle gauge, close at hand, I carefully whittle the blanks to a uniform circular cross section, somewhat larger than the intended needle. Then I tie them into bundles and allow them to dry for a few days. As they dry, I check them every day and any blanks that are not straight are bent (with steam as required) back to being straight, and tie the bundle back together. After a week or so, the wood will be much dryer and firmer. Then I chuck each needle blank into my screw gun (battery powered electric drill) and rotate the blank against coarse sandpaper, I taper and form the tips, and let the blanks dry for a few more days. When the needles are quite dry, I sand and polish them with steel wool to a very smooth surface. On dogwood, I use a beeswax finish - no varnish needed.
There is something about dogwood needles that just feels so nice.
Making Wooden Needles
When my Dad was in school, his roommate was putting himself through school by knitting fine lopi ski socks. Every evening, my Dad’s roommate would go to the cheap movies and while watching the double feature; he would knit a pair of socks.
While my parents were courting, my Dad still had a pair of those lopi ski socks. In those days, my Dad was an avid skier, and those were his favorite ski socks. Soon after my parents were married, my mother washed and shrank those lopi socks. My Dad never really forgave my mother for ruining those socks.
So, one of my first projects after taking up knitting again was to knit each of my parents a good pair of lopi boot socks
To do that, I needed needles. I bought several lots of knitting needles on eBay. Supposedly, these were sets of knitting needles from estates. It was good for me in that I got many knitting needles very inexpensively. It was bad because many of those needles were very low quality. However, I must note that some of those needles were of a much higher quality than any knitting needles that I have been able to find in retail yarn and sewing shops or on the Internet in the last 3 years. Those high quality needles tended to be US size 0 and 1. Those fine needles set a standard for what I wanted in my knitting needles.
Trying to knit those lopi socks with old aluminum DPN was like fighting big nasty spiders. Those needles would fall out, and the sharp ends were always poking me. The wooden needles had gotten wet and been abused so that they were rough and always snagged the yarn. Moreover, the tips had been worn to sharp wedges. They really were not useable. So I sanded those wooden needles, and I changed the shape of the tips. I did not have a good example of what the tip of a needle of that size should look like, so I experimented. Then, I decided that the length of the DPN was a major factor in their convenience of use. So I experimented with length of the needles, and with surface texture.
I could buy hardwood dowel for $0.30 per foot and make set of 5 wooden DPN in about an hour – all by hand without power tools. So with supplies and everything, a set of DPN cost me about $2.00. The process was to cut the dowel to the desired length with pruning shears, taper the end of the needle blank with a pencil sharper, and then sand the taper smooth and to the desired final shape with coarse sandpaper. The sandpaper would be flat on my workbench, and I would hold the needle blank against the sand paper at the desired angle and rub the blank back and forth while rotating the blank as I rubbed. When I had the tip shape that I desired, I would sand the entire knitting needle with progressively finer sand paper and polish with fine steel wool. Then, I would dip the needles in tung oil, allow them to dry, polish with very fine steel wool and finally wax the finished needles with furniture polish. They are beautiful.
The ultimate result was sets of wooden DPN that I liked better than the commercial wooden DPN. The most valuable lesson was that DPN as they come out of the package may not be right for the project at hand. DPN out of the package have average points. If you are working with lopi, then your knitting will be easier if you round the points of your needles a bit. If you are doing fancy Aran patterns, then you may want to make the needle tips longer and add a bit of a concave section just behind the tip of the needle. With wooden needles, you can do this by wrapping sandpaper around a piece of dowel or broom handle, and rotating the needle against the sand paper. If in doubt, use much finer sand paper!
Recently, a local yarn store had one of the better brands of bamboo needles on sale. The price was too good to pass up. I went and bought a bunch of them. A beginner would have tried to use them “as is”, had problems and been frustrated, and maybe quit knitting. I used them as needle blanks. I cut them shorter, I changed the shape of the tips, and I polished the shafts with steel wool. Now, I have tools that feel right and knit easily. And, as the tips wear, I will just sand them back into shape. The experience of making my own knitting needles means that I am confident in maintaining and restoring my treasured tools.
Tuesday, January 17, 2006
Getting Tight
Sailors are famous for getting tight on rum, fighting, and getting damaged. Knit a tight gansey or two (for each of your 6 sons) and your wrists and forearms are going to be sore. If you start knitting too fast you can do real damage to your body. Save your wrists for other things.
Think of knitting as a real athletic activity such as running. It is. If you have not been running at all and then you go out and run 12 miles in an hour, you will damage your body; likewise with knitting. Most knitters are mothers, and they have been caring for their family so they have some “forearm” fitness. But, if you plunge into a tough knitting project, you WILL damage your wrists. If you have not been knitting for 6 weeks, then no more than an hour of knitting per day, and increase by no more than an hour a day no more than once a month (or 10% per week which ever is less.) Hey, I know Christmas is coming, so start early; you do not want to be wearing a wrist brace over the holidays.
If you are a fit knitter and have build up to substantial “mileage’ per week (sorry, I am a runner) then keep it up and do some training every week. Staying in shape really will help your comeback schedule.
The effort to knit depends on a number of factors including yarn lubrication. This is one reason that I like the Cottage Craft yarns – they retain the spinning oils and work easily, they are lubricated.
When I knit with a dry yarn, I often keep a bit of Udderly Smooth (http://www.uddercream.com/products.html) on my hands. This is a lanolin-based cream for dry skin. It is non greasy and inexpensive. Again, I have no connection with the company, I tried a bunch of lotions, and this is what works for me. The cream adheres the yarn and helps to lubricate it. Also, I have trouble maitaining consistent yarn tension when I have dry hands. When my hands are very dry the cream helps me maintain uniform yarn tension. It then washes out of the yarn when I block the garment. (However, if I frog the yarn out, then roll the yarn into a ball and let it sit for a couple of years, the lanolin gets all sticky and I have to skein the yarn, and wash it before I can knit with it.)
I learned to knit using the small muscles in my forearms and hands. That is OK if you are knitting loosely. But if you are knitting tightly, you need to make sure that you are mostly using the large muscles in the upper arm and shoulder. Can you retrain yourself? I do not know. I am half-way through my retraining process – it is like an alcoholic only drinking on Mondays and Thursdays.
My approach to training myself to use my upper arms is to switch from the Continental method (yarn controlled by left hand) to the English method with the yarn in the right hand with a knitting stick. With a knitting stick, knitting is done on double pointed needles with the lower end of the right-hand needle anchored in the knitting stick. Pictures of knitting sticks may be seen at (http://www.daelnet.co.uk/features/knitting/history3.htm)
I made my own knitting sticks, and they work just fine. Someday soon, I will tell you how to make your own knitting sticks, or reach over and Google “knitting sticks” and you can find a place to buy commercially knitting sticks made out of Russian olive or maple. i have not tried the commercial ones, I just know that they are out there.
Yarning
Every species has its survival mechanism. Cod like places where the fishermen are exposed to wind, fog, and cold. In response, fishermen have their gansey.
I like to fish for cod in the Gulf of the Farallons off of San Francisco. During the cod season, it is cold and windy and drizzly, with a serious swell rolling out of the North. That is where I started to meditate about, “How did those Irish sailors stay warm while fishing on the Finnish Sea?” Well, they stood in barrels of straw to keep their feet and legs warm and dry as seas splashed across the deck. If you have a wooden barrel to keep the wind off of your legs, what kind of a tightly knit sweater do you wear to keep your upper body warm?
First, a garment that is every so tightly knit to keep the wind out. Then, a stitch pattern that does three things. It gives the fabric a 3-dimentional aspect to provide maximum warmth with minimum weight. The stitch pattern also provides additional stretch in a garment that is so tightly knit and somewhat felted. Finally, the stitch pattern provides air ventilation between the waterproof oilskins worn over the gansey allowing water vapor to be carried off. This theory is familiar to anyone that has considered the problems of athletes and workers staying warm in cold environment. It is just the sailors of old hit on a solution that is attractive enough to wear to weddings, funerals, and church on Sunday. Our modern sporting gear companies do not aim for their gear to be both so practical and so beautiful.
I have no connection to Cottage Craft. I tried a bunch of stuff, and I am just telling you what I found that works. Experiment! I am sure that you can find something else that works!
My beautiful “Fisherman’s” sweater that I bought at Cottage Craft in St. Andrews, N.B (http://townsearch.com/cottagecraft/)makes a great ski sweater. But, it does not really work out cod fishing. It is not tightly enough knit. It is knit at only 5 stitches per inch. The matching yarn that Cottage Craft gave me to make a hat out of, had instructions to use US size 6 needles. I did, and I knit a very nice cap (actually I knit a bunch of stuff). This caused me two years of frustration, even with the solution right under my nose.
When I looked at Gladys Thompson’s books on Patterns for Guernseys, Jerseys & Arans, I thought that I would have to use a much thinner yarn than the Cottage Craft 2-ply yarn that I had been using on US size 6 needles. But when I used a thinner yarn, sizing/ gauge came out wrong and the stitch patterns did not look right. The stitches just did not look right. The solution was to use the Cottage Craft yarn on US size 1 needles. This is a tight, tight knit.
The Cottage Craft yarn has about 272 yards per 113 grams (4 oz). It is oiled and has a lamby smell when it gets wet. (I will come back to this oiled issue later in the week.) It also has some vegetable matter in it. On the other hand it is very inexpensive at US$4.00 / 4 oz. But this yarn works for the Gladys Thompson patterns. The winning point for this yarn is the wonderful colors that it comes in.
The other yarn of about this weight that I have found is from Iriss of Penzance at http://www.iriss.co.uk/ganseys.htm. I have not tried this yarn. It may be less scratchy, I do not know. It is more expensive, and the colors (over the internet) are close to boring.
On Pins and Needles
Good tools and materials make knitting dramatically easier. Good tools and materials turn the chore of kitting into a mediation of love; and, poor tools turn knitting into drudgery and torture.
The tools of knitting are remarkably simple, and at the same time remarkably complex.
If the yarn does not slide easily across the needles, then knitting will be slow and burdensome. If the yarn slides too easily, then the needles are likely to fall out, and stitches will be dropped and excessive wrist motion will be required to form the stitches.
If you are knitting socks on double pointed needles (DPN), then you are likely to want more friction between the yarn and the needles, than if you are knitting a ski sweater on circular needles.
Wooden or bamboo knitting needles have many advantages and are very popular for some purposes. Wood is lightweight, warm and pleasant to the touch. Good wooden needles are a sensual pleasure to handle. Wooden needles are easy to make yourself or inexpensive to buy. They are generally non-toxic, and less likely to inflict grievous harm when dropped or sat on. The disadvantages of wooden needles include the fact that they do wear and the tips need to be reformed every so often, defects or cracks can form snags that will destroy yarn and rip your hands, they need to be kept dry, and they break all too easily (particularly in smaller sizes.)
Steel and brass needles, on the other hand are strong, durable, and very smooth. On the other hand they can be cold and heavy. Believe me, cold and heavy is nasty when you have a lot of knitting to do. Stainless steel is less cold and brass is heavier, but good old steel is cheaper – and has other advantages that we will get to later.
I have heard that early knitters in the British Isles used goose quills as knitting needles. That is fine if you have lots of goose quills and not much else to make into knitting needles. I have plastic and nylon knitting needles. Plastic and nylon seem like such great materials for knitting needles. They are light and smooth. They have a bit of flexibility. I am sure that if I did not knit, and someone asked me to make him or her a set of kitting needles, I would make them out of plastic or nylon – and they would try them and hate me. But, I do knit, and I make the kind of knitting needles that I like to use.
For the last two Christmases, I made and gave knitting needles made out of flowering dogwood. For it seems that the kind of wood does matter. And, the finish matters.
Last fall a local yarn shop (LYS) had a sale on one of the good expensive brands of bamboo DPN. It was a good sale, and I bought a bunch. I got them home and opened them – YECH. They had kind of a rough surface that snatched at the yarn. No wonder they were on sale! However, I wiped them with a bit of extra fine steel wool, polished them with a bit of furniture wax, all of which took two minutes per set of 5 needles. Then, I had as fine a bunch of wooden needles as could be had at any price.
Back when I was an art student, I had a professor that made a great deal of money creating commissioned art objects. I was truly in awe at the amount of money he made. He told us, “That if you are going to make money at art, then you need to spend 20% of your time learning skills and making/developing new tools.”
If you are a knitter, and do not know about wood and metal finishing, then find a good local full service hardware store and get to be friends with them. Any kind of knitting needle will wear and you will need to either replace the needles or refinish them. Even the best steel knitting needles are a consumable if you do a lot of knitting.
Monday, January 16, 2006
Starting Again
I knitted in college, and then dropped it. Thirty years later my wife and I were buying “fishermen’s” sweaters in Canada. As a discount, they gave my wife a free hat with her sweater, but they did not have a matching hat for me, so they gave me 3 skeins of yarn. I bought myself some needles, some books on knitting, and I started knitting again. I read the books, and I got to be a pretty good knitter.
I got more critical of knitting. I came to admire the traditional Guernseys, Jerseys and Arans, (ganseys) with their fine, intricate, and delicate stitch patterns. When wives were knitting the sweaters with love to keep their husbands and sons warm, the stitch patterns were worked at 7 or 8 stitches per inch. Now, such patterns are worked at 5 stitches per inch and the effect is very different.
But the modern books and classes do not tell us how to knit the traditional gansey. I take hints from history and experiment with modern materials until I come up with something that approximates the appearance and function of the traditional gansey.
Subscribe to:
Posts (Atom)
.jpg)